Exporting Design System Tokens From Figma to WordPress
One of the key challenges of running a site or series of sites at scale is ensuring design consistency and compliance with a design system. Often the definition of the design system lives in Figma, but is manually implemented in code. If there are any changes to the system during development or large-scale replacements in retheming, the definition and implementation go out of sync.
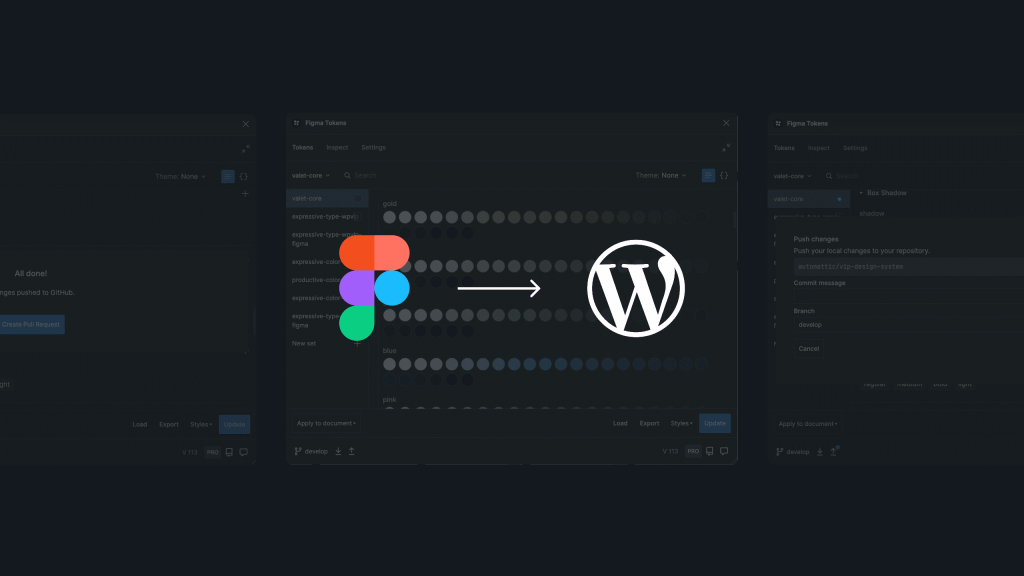
To solve this challenge, we’ve created a tool to keep design systems in Figma synced with WordPress themes. We’ve been using it on our own site, wpvip.com, and have found it greatly simplifies this process while ensuring consistency.
Our goal is to have a single source of truth for the design system so there’s no disconnect between the design and implementation. By utilizing the Figma Tokens plugin, we create this single source of truth, keep all our design tokens in a version control system, and automate updates to the design system in theme code.
The process works like this:
- The design system is defined in a Figma document.
- We utilize the Figma Tokens plugin to define design tokens used in Figma.
- Using Figma Token’s GitHub storage, we export tokens to a repository.
- With the vip-design-system-bridge tool, we insert design tokens into WordPress via the theme.json custom section.
- In code and CSS, we use WordPress’ generated –-wp–custom classes to reference the design tokens.
This makes design system changes and re-themes easy to push into code. When changes are made in Figma, they’re synced with Figma Tokens, and we run the vip-design-system-bridge tool. Design tokens are then updated in our theme’s configuration without making other code or CSS changes.
We’ve put together an example design system and theme to demonstrate the process from Figma to WordPress. In this post, we’ll cover the steps to:
- Make a copy of an example design system.
- Use the Figma Tokens plugin to add design tokens.
- Change a color token in Figma and export new design tokens.
- Run a local copy of WordPress with VIP’s local environment manager to view the example WordPress theme.
- Use the vip-design-system-bridge tool to update the WordPress theme with new design tokens.
These resources are also available to help get you started:
- Simple design document system in Figma based on the Material 3 Design Kit template.
- Set of design tokens used to integrate with Figma Tokens.
- Example WordPress theme configured to use the colors and typography provided by the design system.
Set up Figma tokens
We’ll start with the designer workflow by using a design system in Figma and exporting design tokens.
To install Figma Tokens, log into Figma and visit the Figma Tokens plugin page. In the top right corner, click “Try it out” button. On the next page, click “Run” button. Once installed, the plugin will be available to use in Figma documents.
1. Get a copy of the design system
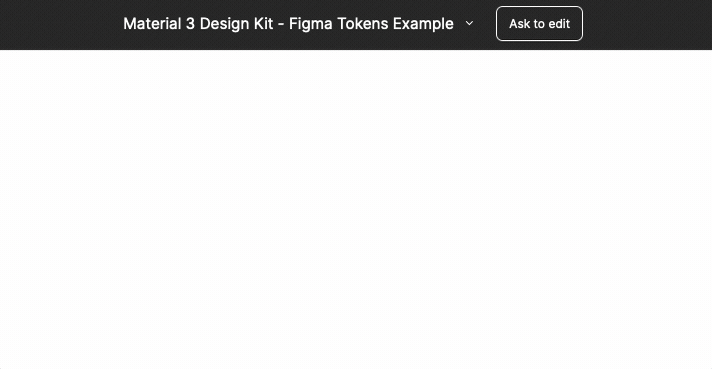
We’ll use a small design system in Figma based on the Material 3 Design Kit template for our example.
- Open the example Figma design system. We’ll make a local copy of this document to use with the Figma Tokens plugin.
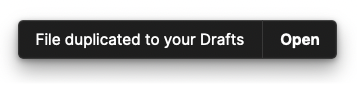
2. On the right side of the document title, click the down arrow and select “Duplicate to your drafts”:
3. In the pop-up on the bottom of the page, click the “Open” button:
2. Connect Figma Tokens to design tokens
We’ve created a set of design tokens that are ready to be imported into the design system document using Figma Tokens. These design tokens were created directly in Figma using the Figma Tokens plugin. Here’s how to connect the Figma Tokens plugin to the existing design tokens:
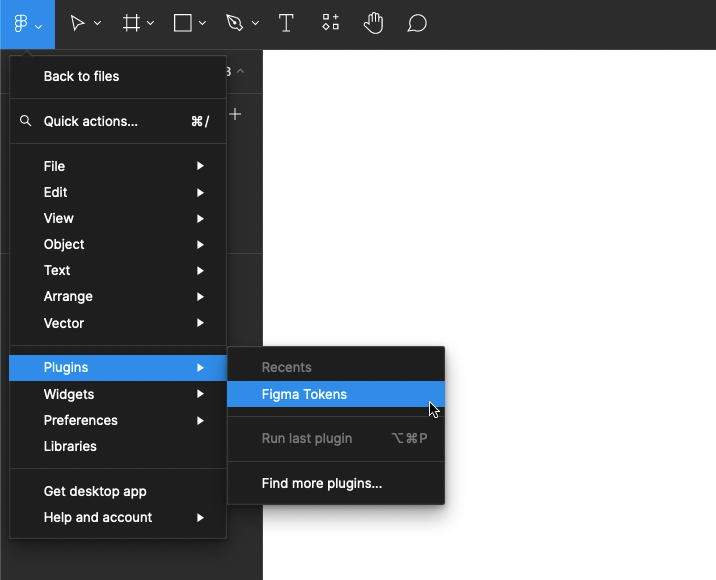
- Open the Figma document from the previous step. On the top left of the page, click the main menu button and select Plugins -> Figma Tokens.
2. After Figma Tokens launches, select the “Get Started” button. You should see an empty set of tokens on the next page:
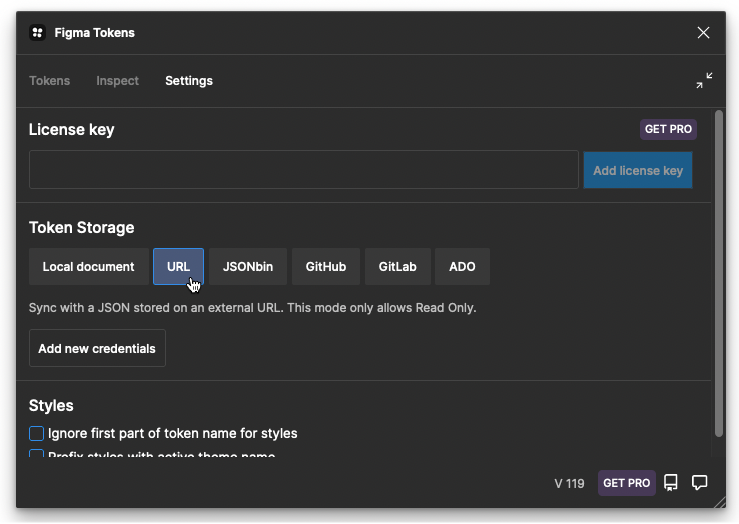
3. At the top of the plugin, click the “Settings” tab. Under the “Token Storage” section, click the “URL” button:
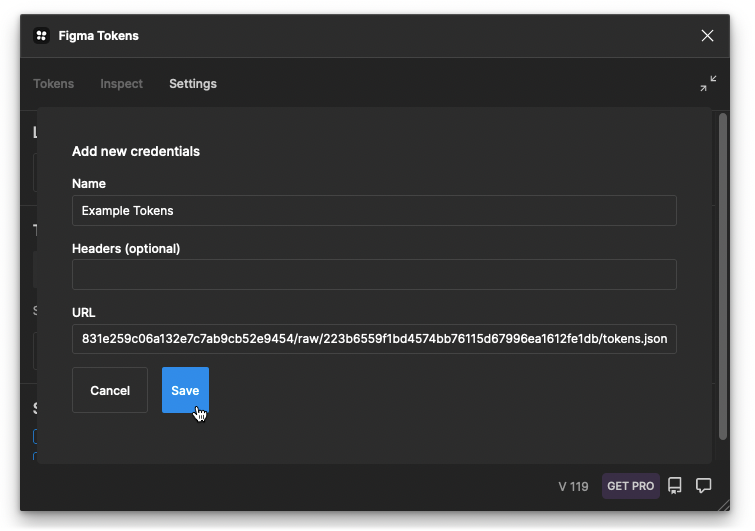
Click the “Add new credentials” button. In the “Name” field, enter any name (e.g., Example Tokens). In the URL box, enter this URL:
https://raw.githubusercontent.com/Automattic/vip-design-system-bridge/trunk/docs/design-tokens-example/tokens.json4. The result should look something like this:
5. Under “Token Storage,” click the “Local document” button. In the confirmation pop-up, click “Yes, set to local.”
6. Due to a small bug in Figma Tokens, the page needs to be refreshed to allow edits to the tokens imported from URL. Note that in a real design process tokens can be synced via the GitHub token storage option— this step is necessary only for this tutorial example.
- After changing the token storage option to “Local document,” reload the page.
- Re-open Figma Tokens via the plugin menu.
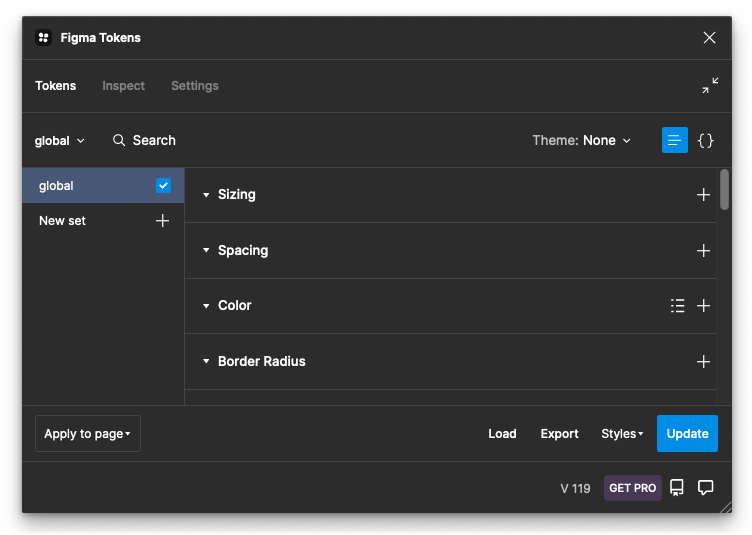
7. In Figma Tokens, go to the “Tokens” tab to view all tokens. Using the checkboxes on the left, select the “global,” “material-3-color,” and “material-3-text” token sets. You should now be able to view type and color design tokens in the main panel:
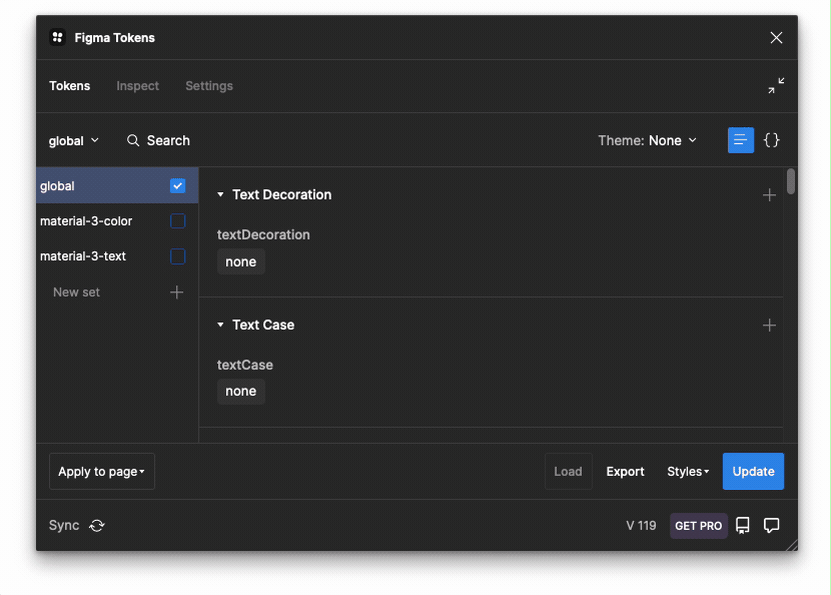
The “global” set represents the full color palette and typography options available in the design system. The “material-3-color” set contains named design token colors used by the design system, for example “theme/light/primary” and “theme/light/background.” The “material-3-text” contains typography options used by the design system.
Note: This tutorial uses URL token storage to simplify setup. In a real design system document, a versioned token storage system like “GitHub” or “GitLab” should be used instead. These allow tokens to be directly pulled and published to a repository from Figma.
3. Change a design token and export
This section will cover changing a design token for the background to a new value, and exporting the updated token file for use in a design system.
- In Figma Tokens, click the “material-3-color” color set. Next, in the Figma document under the “Light Theme” section, select the “Background” block and see that the matching design token is selected in Figma Tokens:

2. In Figma Tokens, right click on the background color token and select “Edit Token.” Change the value to {color.error.70} (or another palette color token of your choice) and click “Update”:

As shown above, the selected background color block should change to match the new color token.
3. In the lower right of the Figma Tokens plugin, click “Export.” Check “All token sets,” then go to the bottom of the dialog and click the “Export” button.
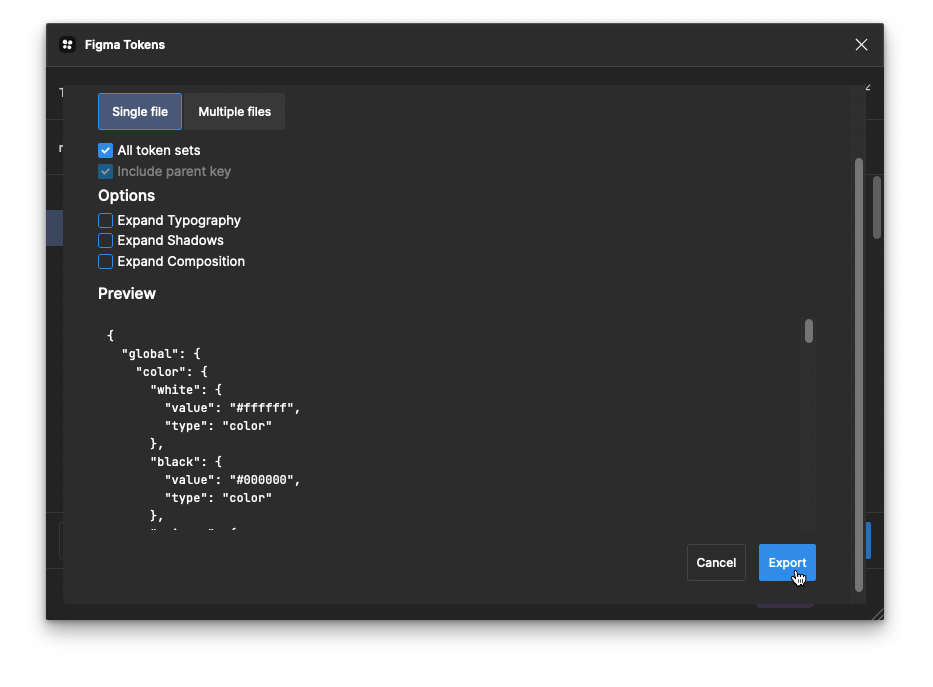
Note: When using versioned token storage system like “GitHub,” token changes can be directly pushed to a repository branch instead of downloading via the browser.
Setup tools for WordPress
In the next two steps, we’ll use the exported design tokens from Figma to update a locally-running WordPress theme. Using these tools requires some experience with GitHub, running terminal commands, and npm. Follow along using the following tools:
Download or clone a copy of the vip-design-system-bridge repository. WordPress VIP customers can also directly use their existing WordPress code with a copy of the token-theme theme included.
- Install the vip dev-env terminal tool, which is used to run a copy of WordPress and see token changes:
$ npm install -g @automattic/vipNote: You may also need to install Node.js and Docker Desktop as prerequisites for vip dev-env. See the Prerequisites section on this docs page for more information.
4. Run a local copy of WordPress
To see our design tokens update, run a local copy of WordPress using npm and vip dev-env. Ensure the VIP CLI is installed and a copy of the vip-design-system-bridge repository is downloaded locally.
- With the vip-design-system-bridge repository folder downloaded locally, run these commands to create a local WordPress website:
cd vip-design-system-bridge/docs/design-tokens-example

vip dev-env create --multisite=false --php=8.0 --wordpress=6.1 --mu-plugins=demo --elasticsearch=false --phpmyadmin=false --xdebug=false --app-code=token-site/ --slug=token-site --title=Tokens
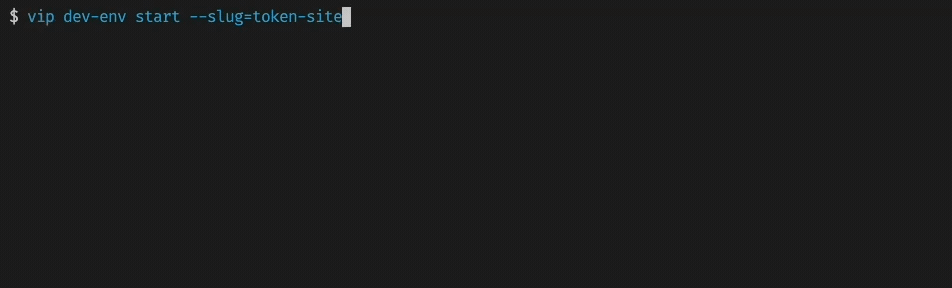
2. After installation is completed, run this command to start the environment
vip dev-env start --slug=token-site The result should look like this:
3. Next, activate the token theme by running:
vip dev-env exec --slug=token-site -- wp theme activate token-themeThe local version of WordPress should now be running with our token theme enabled.
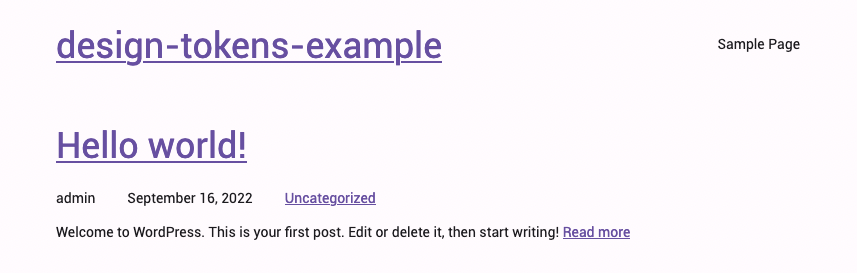
4. Visit the WordPress instance running locally at http://token-site.vipdev.lndo.site/. You should see a WordPress page using the simplified Material 3 UI theme:
5. Use tokens to update WordPress theme
Now that the default theme is visible, we can update our theme in-place and view the results of the token changes.
Navigate to the downloaded vip-design-system-bridge repository in a terminal and install npm dependencies for the token processing script:
cd vip-design-system-bridge/
npm install
Next, run the following command. Update –tokenPath to match the path of tokens.json downloaded in step 3:
node ingest-tokens.js --tokenPath=~/Downloads/tokens.json --themePath=./docs/design-tokens-example/token-site/themes/token-theme --sourceSet=global --layerSets=material-3-color,material-3-text --overwriteHere’s a breakdown of the flags used in this command:
–tokenPath=~/Downloads/tokens.json
# The path to the tokens.json file downloaded from Figma Tokens. Change
# this to match the path of the tokens.json file downloaded in step 3.

--themePath=./docs/design-tokens-example/token-site/themes/token-theme
# The path to the WordPress theme folder that’ll receive the updated tokens

--sourceSet=global
# Use the tokens in the “global” set as a source. Source sets are excluded
# from the output, but can still be referenced by other token sets. This
# option is used to avoid including the whole color palette and typography
# choices in the resulting tokens.

--layerSets=material-3-color,material-3-text
# Use the “material-3-color” and “material-3-text” token sets to produce the
# final output. All tokens included in these sets will be available to
# WordPress.
When the command above is run, it should produce this output:
Using source and layer sets for tokens (source: global, layers: material-3-color, material-3-text)
✔︎ Processed with token-transformer

wordpress-theme-json
✔︎ src/build/tokens.json

✔︎ Processed with Style Dictionary
✔︎ Wrote theme file: ~/vip-design-system-bridge/docs/design-tokens-example/token-theme/theme.json
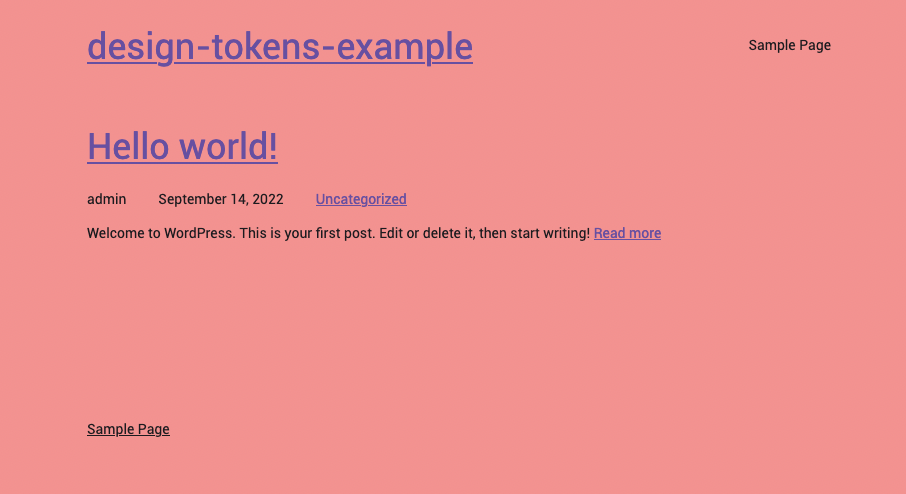
Now that the tokens have been updated in WordPress, visit http://token-site.vipdev.lndo.site/ or refresh the page. You should see that the background color has changed to the token value assigned in Figma:
In conclusion
We’ve demonstrated the end-to-end process for creating a single source of truth for a design system and pushing those into a WordPress theme. However, there are important and complex topics that haven’t been covered in this post, such as the process of creating tokens for Figma Tokens, and designing a WordPress block theme that can take advantage of those tokens.
That said, we hope this provides a useful process for those wrestling with design system implementation in WordPress, and that the example code can be used as a starting place.
For related design system topics, see these resources:
Figma Tokens plugin – Getting Started.
Authors

Alec Geatches, Senior Software Developer at Automattic
Enterprise WordPress developer and design systems enthusiast living in Taipei, Taiwan.

Gopal Krishnan, Senior Software Developer at Automattic
Gopal works on WordPress VIP’s decoupled WordPress offering, with an interest in design systems and Gutenberg. He’s based out of Sydney, Australia and has recently moved from Canada.